This guide requires basic knowledge in Linux. Please let me know if any part can be improved.
What you’ll need
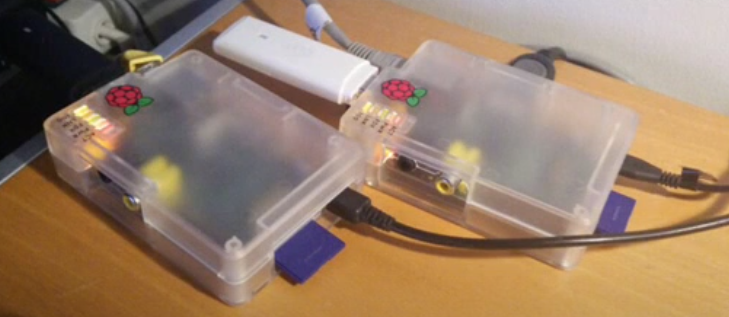
- A Rasberry Pi
- A 16 Gb SD-card
- A GSM USB dongle
- An image file with the latest version of RasPBX
- A USB power source
- A SIM card
You can use any Raspberry Pi. I used a Raspberry Pi 1 Model B from 2012, but newer models should work too.
Just make sure to use a compatible GSM dongle. At the moment, only Huawei dongles are supported. A list of compatible models is available at chan_dongels github. I used a model E1750.
If your dongle is locked to a specific carrier, make sure to remove the lock first, or get a pre-paid SIM card from the correct carrier.
Also, make sure your power source is of correct amperage for your Pi.
1. Prepare the SD card
Download RasPBX from raspberry-asterisk.org. Write the image to the card with your favorite imaging tool. Place it in your Pi and boot.
2. Run raspi-config
The image file only uses 4 Gb of the SD card, so you’ll need to expand the root partition to use all the space. Run the command:
raspi-config
Choose expand_rootfs and follow the instructions.
3. Find the IP address
List the network settings with the command:
ifconfig
Make a note of the IP address. If you like you can unplug you monitor and connect to the Pi via SSH from this point.
4. Configure asterisk och FreePBX
Open up your web browser and navigate to the IP address you got from step 3. This will launch the FreePBX web GUI.
Default login is:
user: admin
password: admin
Follow the steps from this guide. Then reload the setting via the command
amportal restart
You only have to this the first time. From now on, you can activate changes by using the apply config button in the GUI.
5. Deactivate the PIN on your SIM card
In order for the dongle to work correctly, you need to deactivate the PIN. Do this by inserting the SIM to a phone and use the phone security settings.
6. Install Chan_dongle
The image file contains an installation script for chan_dongle, which will be the trunk between the GSM dongle and the asterisk.
Run the command
install-dongle
The script will install chan_domgle.so and create a basic config. When the script is done, attach the dongle to your Raspberry Pi. If it was already attached, you need to unmount and re-mount it.
Then go to the FreePBX GUI: Connectivity – Trunks and then Add Custom Trunk. Choose a trunk name, make Outbound CallerID the phone number of your SIM card and add the following to Custom Dial String
dongle/dongle0/$OUTNUM$
Then add an incoming and an outgoing route for the trunk. For the incoming, set DID Number to the SIM card phone number.
Then save and activate the configuration.
7. Make sure everything works
In an SSH session, use the following command
asterisk -rx "dongle show device state dongle0"
Your should get the current status of the dongle. If everything is okay, the output should look something like this:
root@raspbx:~# asterisk -rx "dongle show device state dongle0"
 -------------- Status -------------
 Device                  : dongle0
 State                   : Free
 Audio                   : /dev/ttyUSB1
 Data                    : /dev/ttyUSB2
 Voice                   : Yes
 SMS                     : Yes
 Manufacturer            : huawei
 Model                   : E1750
 Firmware                : 11.126.13.00.00
 IMEI                    : 351910041282620
 IMSI                    : 240016022904648
 GSM Registration Status : Registered, roaming
 RSSI                    : 20, -73 dBm
 Mode                    : No Service
 Submode                 : No service
 Provider Name           : Tele 2 AB
 Location area code      : 52
 Cell ID                 : 5204BF
 Subscriber Number       : Unknown
 SMS Service Center      : +46705008999
 Use UCS-2 encoding      : Yes
 USSD use 7 bit encoding : Yes
 USSD use UCS-2 decoding : No
 Tasks in queue          : 0
 Commands in queue       : 0
 Call Waiting            : Disabled
 Current device state    : start
 Desired device state    : start
 When change state       : now
 Calls/Channels          : 0
 Active                : 0
 Held                  : 0
 Dialing               : 0
 Alerting              : 0
 Incoming              : 0
 Waiting               : 0
 Releasing             : 0
 Initializing          : 0
8. Record speech files
This is the fun part, where we will record the phrases the robot will be using.
You can use any phrases you want. I used 16 of them:
- ”Yes, hello?
- ”Hi?”
- ”I see”
- ”Sure thing.”
- ”This seems familiar. Did you call me about this last week?”
- ”Hmm, that’s right. What was your name again?”
- ”Yes, I remember. Do you think this will be right for me?”
- ”Sorry, could you please repeat that?”
- ”I beg your pardon, but the sound is very bad. Again please?”
- ”Could you please turn up the volume?”
- ”Yes! Much better. I guess it was a temporary glich.”
- ”Right… Where did you say you were calling from?”
- ”Could you tell me more about your return policy?”
- ”Sounds resonable.”
- ”Hmm, okay. Could you give more details?”
- ”Okay, this might be something. I just need to check something, please hang on”. <wait and make some noise in the background> ”Sorry about that. Where were we?”
9. Name the phrases and copy them to your Pi.
Save the sound files in wav format and name them ”Phonetroll1”, ”Phonetroll2” all the way to ”Phonetrroll16”. The names are case sensitive.
Then create a new directory to put them in:
sudo mkdir /var/lib/asterisk/sounds/Telefontroll
Then copy the sound files to that directory with your favorite FTP client.
You’ll also need a wav files with two minutes of silence. Name it backgroundnoise.wav and copy it to the same directory.
10. Create an Asterisk destination
Edit the file extensions_custom.conf
nano /etc/asterisk/extensions_custom.conf
Add the following lines
[Phonetroll]
exten => talk,1,Set(i=${IF($["0${i}"="016"]?7:$[0${i}+1])})
same => n,ExecIf($[${i}=1]?MixMonitor(${UNIQUEID}.wav))
same => n,Playback(Phonetroll/Phonetroll${i})
same => n,BackgroundDetect(Phonetroll/backgroundnoise,1500)
This script will look for 16 phares in the directory Phonetroll/ to play. When the first phrase have been played, the script will wait for 1500 milliseconds of silence and then play phrase 2. When phrase 16 have been played it will loop back to phrase 7 and then repeat until the caller hangs up.
Then save the changes and close the file.
11. Create an incoming route
In the GUI: Connectivity -> Inbound Routes, add a new route for all incoming calls and direct them to Application -> Custom destination -> Phonetroll
Save the settings.
12. Add the destination in FreePBX
The sound files are in place and the Asterisk in configured. Now it’s time to direct incoming calls to the Phone Troll. In the GUI, go to Admin –> Custom Destinations.
Add a new desination with the following settings:
Custom Destination: Phonetroll,talk,1
Description: Phonetroll
Then Submit Changes and Apply Changes.
13. Record the calls
Everything should be working, but it’s no fun if you can’t listen in…
In order save all calls, in the GUI, goto Applications -> Call Recording. Choose Add Call Recording.
Pick a name, like ”incomig calls”. Set the recordning mode to Force.
Under destination, goto custom destinations and mark ”Phonetroll”
That’s it! Incoming calls will be saved by default in
/var/spool/asterisk/monitor
Enjoy!


Thanks for this guide! I used it along with CHAT GPT4 and youtube vidoes to get raspbx working together with a robot.
My setup is an Huawei E1550 modem with RASPBX on a raspberry pie 8gb. Getting Raspbx to run on a rp4 took a little searching, but it was pretty easy (https://forums.raspberrypi.com/viewtopic.php?t=346302).
Now its running on a raspberry pie 3, since ill use the 4 for something more demanding.
Thanks for your guide Peo!
Glad you found it useful. Do you have any fun calls to share? 🙂